4.3. Échange de données INTERLIS
Il s’agit d’un guide sur la façon d’importer/exporter des données entre QGEP et INTERLIS 2 Transfer Format (xtf).
4.3.1. Général
The QGEP plugin includes an INTERLIS import/export feature. It is currently capable of importing and exporting to the following models:
VSA-DSS “DSS_2015_LV95”
SIA405 Abwasser “SIA405_ABWASSER_2015_LV95`
VSA-KEK “VSA_KEK_2019_LV95”, which is an extension to the SIA405 wastewater model SIA405_ABWASSER_2015_LV95 (for more details see config).
Note that currently, exports are possible in German only. Translated exports are on the roadmap, let us know if you are interested in this feature. In this blog post the manual translation with the tool ili2db is explained in detail.
4.3.2. Prérequis
4.3.2.1. Java
Vous avez besoin de Java sur votre système.
Windows : Java for windows download MacOS : Java for MacOS download Linux : use the package manager
4.3.2.2. Bibliothèques Python
Vous avez besoin de sqlalchemy et geoalchemy2.
To install : before launching QGIS, open OSGeo4W Shell
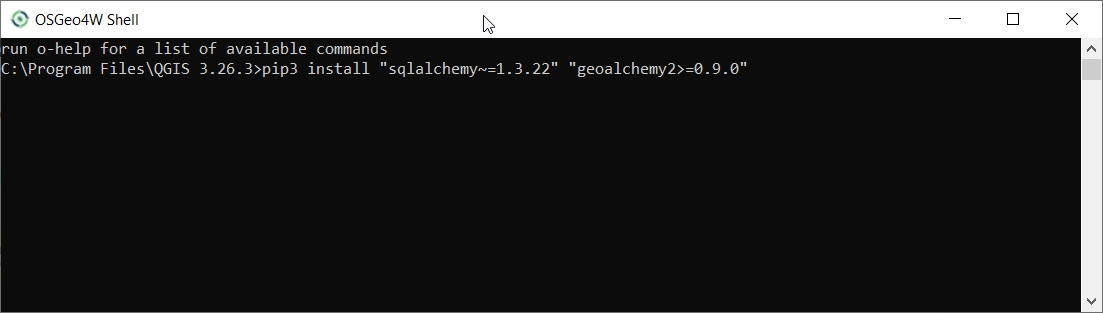
and type:
>>> pip3 install "sqlalchemy~=1.3.22" "geoalchemy2>=0.9.0"
If the command fails, try:
>>> pip3 install --upgrade pip
Note
If pip cannot be found, make sure you’ve installed the python3-pip package using the OSGeo4W network installer (if you’ve installed the standalone version of QGIS, it should be included).
If this command still fails, try:
>>> pip3 install --target=c:\somewhere\other\than\the\default --upgrade pip
where c:\somewhere\other\than\the\default is the path to your current pip package
The same –target flag can be added to install sqlalchemy and geoalchemy2 in another location.
4.3.2.3. Modelbaker
The QGEP plugin will propose to install the Modelbaker plugin automatically. If that did not work, install the QGIS plugin Modelbaker manually from the QGIS plugin manager (version 6.4 or newer but older than 7.1).
4.3.2.4. Version QGEP
The export only supports up-to-date QGEP datamodel (1.6.1 at the time of writing). Ensure your datamodel is fully updated before trying to import/export.
4.3.3. Utilisation (GUI)
4.3.3.1. Activer le mode admin
Dans la boîte de dialogue plugin>QGEP>settings, sous l’onglet Developer options, assurez-vous que le Admin mode est activé. Redémarrez QGIS.
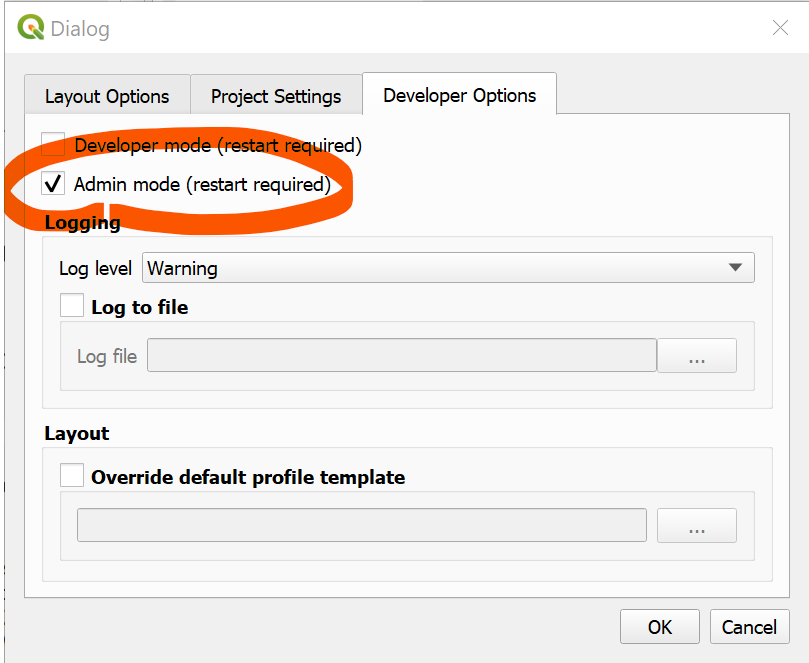
Vous devriez maintenant voir les nouveaux boutons import et export dans la barre d’outils QGEP.

4.3.3.2. Export
Pour exporter vos données QGEP, cliquez sur le bouton export. Le dialogue suivant apparaîtra.
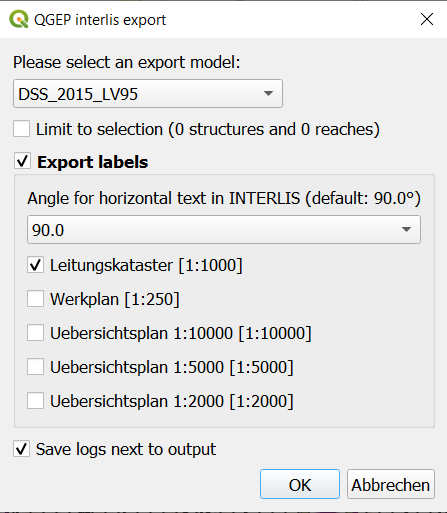
Choose the model you want to export into.
Note
If you select VSA_KEK_2019_LV95 then two xtf files are created - SIA405_ABWASSER_2015_LV95 (the network data) and VSA_KEK_2019_LV95 (network and sewer TV data).
If you have an active selection in the nodes and/or reaches layer, you can choose to restrict the export to that selection. This is especially useful in combination with the upstream/downstream selection tools.
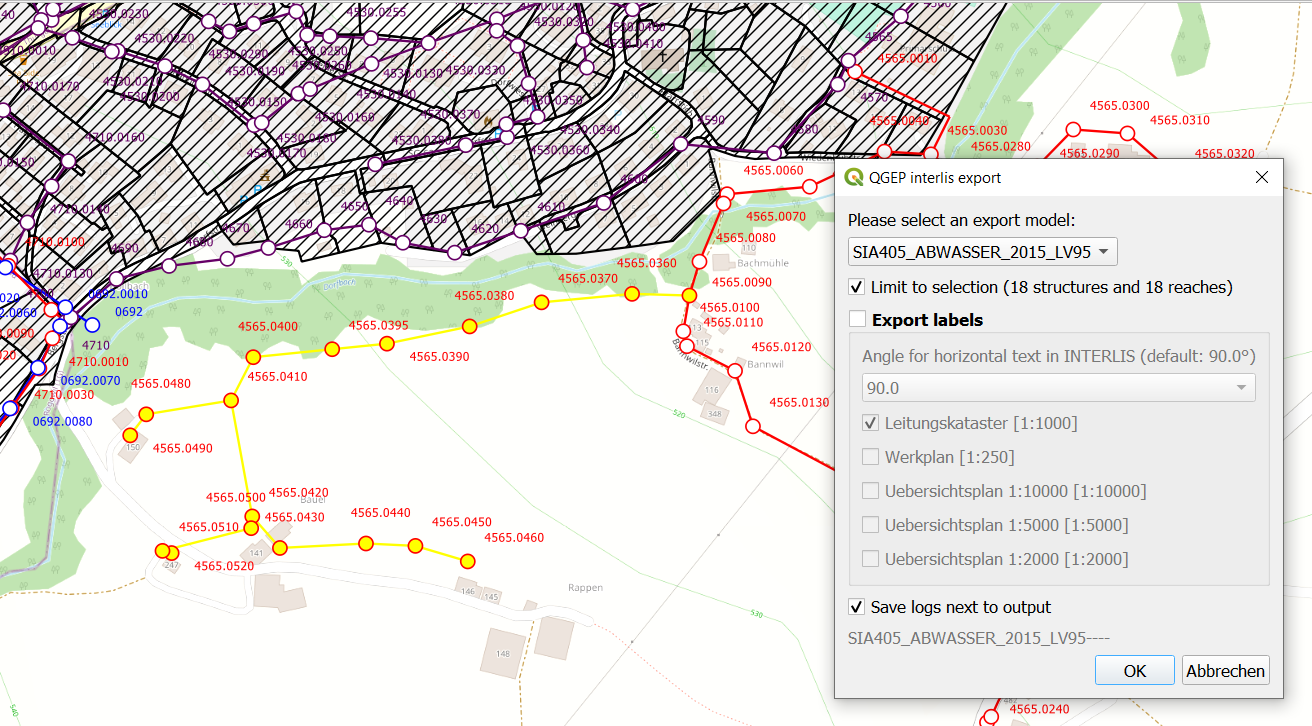
The export tool is capable of exporting label positions for different scales. You can choose which scales you are interested in exporting by selected/deselecting them.
You can also change the angle for horizontal text in INTERLIS if your target system has another convention than INTERLIS.
Ensuite, confirmez le dialogue et choisissez où enregistrer le fichier .xtf.
Note
The export model name will be added to your filename that you choose. export.xtf will become export_DSS_2015_LV95.xtf
Note
Note that windows file pathes with empty strings in the directory path or filename are not supported at the moment.
Note
Notez que pour des exportations importantes/complets, l’exécution peut prendre beaucoup de temps.
Note
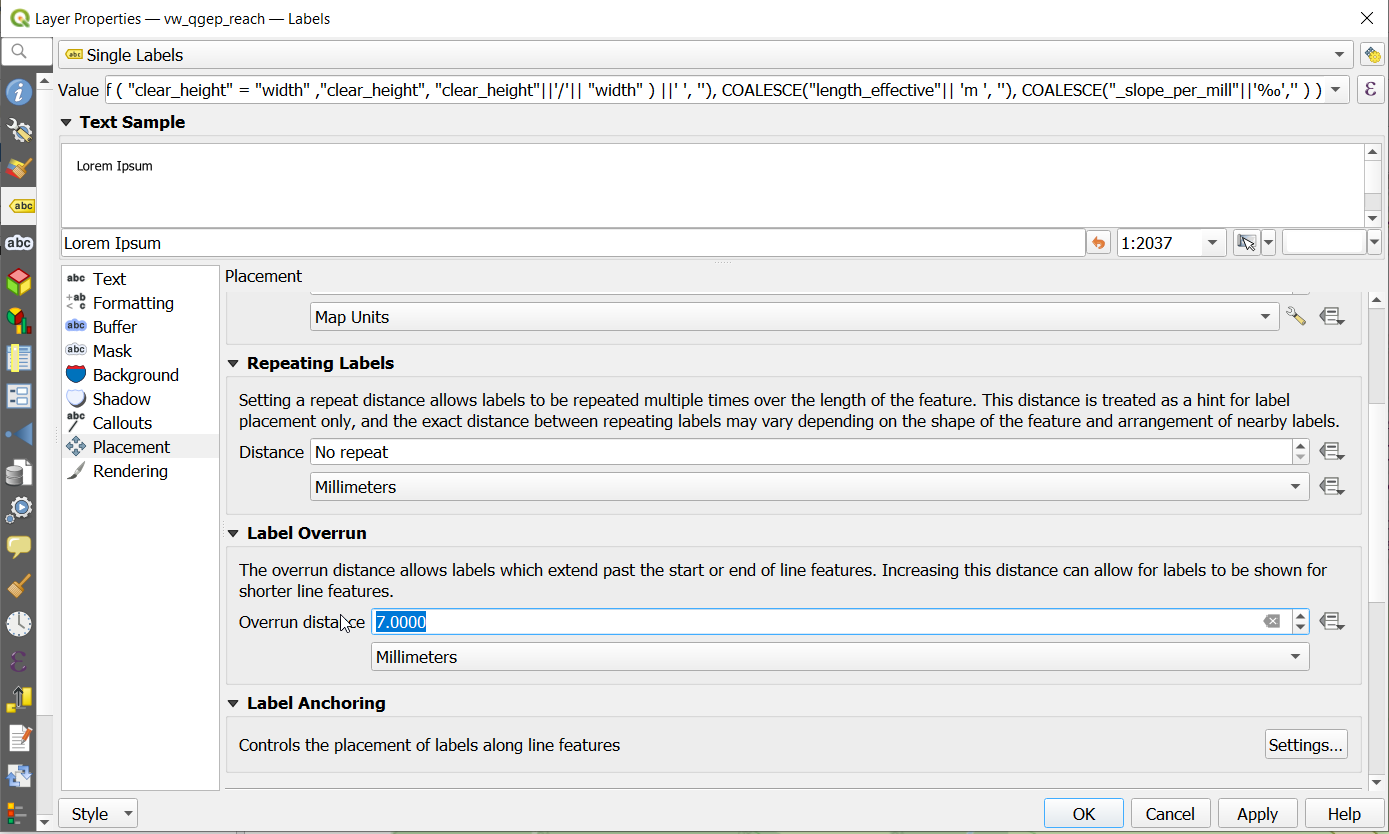
Note that QGIS standard behaviour for too long labels is to turn them horizontally (orientation = 0). You can adjust the properties of the vw_qgep_reach layer - Symbology - Placement - Label overrun from « no overrun » to e.g. 7 mm (Millimeter)
Note
Note that remark fields are truncated to 80 characters on INTERLIS Export, as the INTERLIS definition is like this. If you have remark fields with more text then consider to move this data to documentation with the classes « file » and « data_media » so it can be exported to INTERLIS completely where you can add any document, photo or video to a class.
INTERLIS export starts with two integrity checks:
1. Integrity check Organisation subclasses For VSA-DSS 2015 Export each organisation needs to be related to one of the seven subclasses of organisation (administrative_office, canton, cooperative, municipality, privat, wastewater_association, wastewater_treatment_plant).
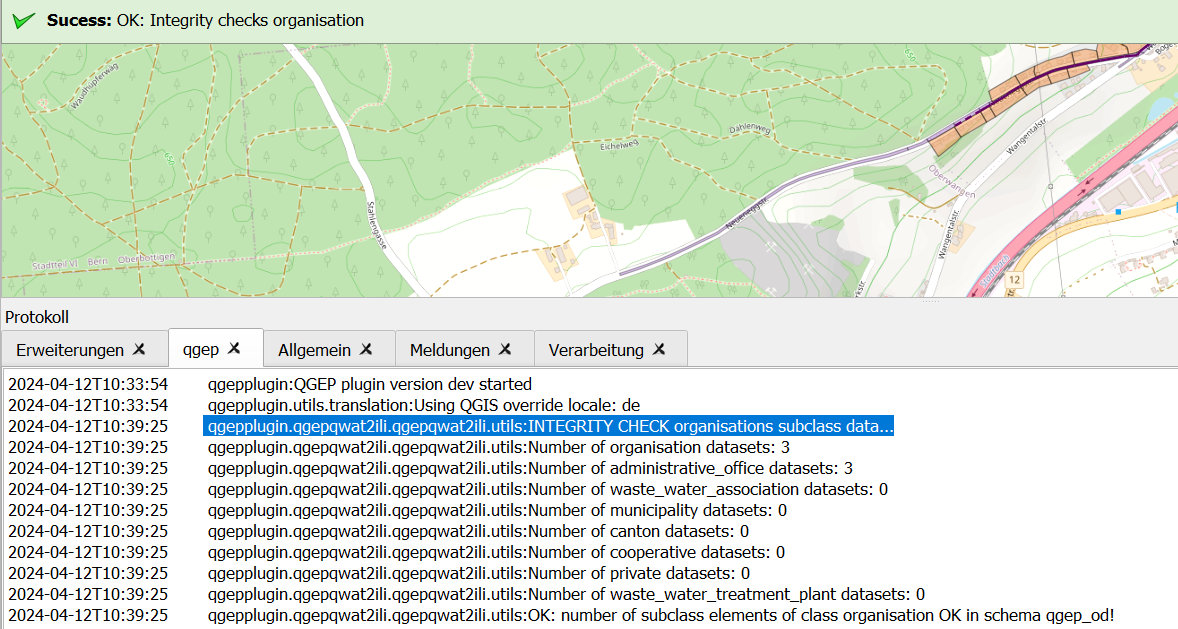
If you get this error add a superclass reference by adding the value of the respective organisation in the corresponding organisation subclass.

2. Integrity check identifiers All export models define the identifier attribute as MANDATORY. Therefore the export tool first checks if there are identfiers that are NULL
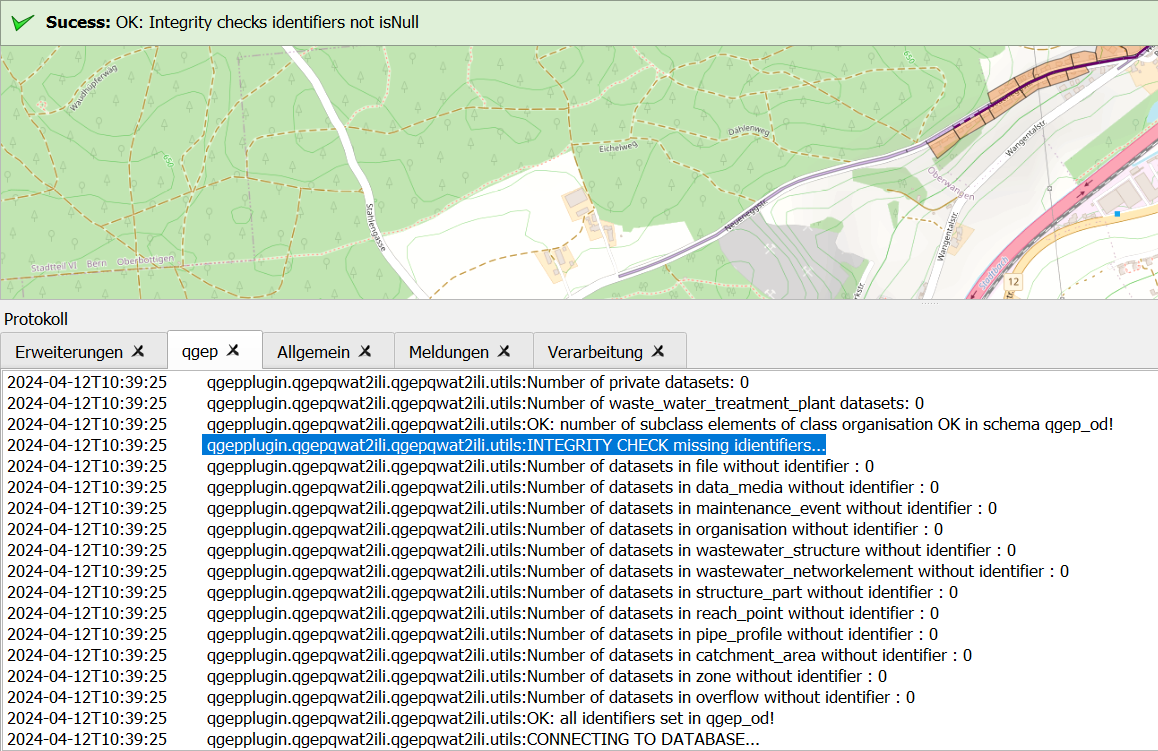
You will get a list of missing identifiers per class. Please add an identifier. If you do not have a separte identifier scheme for that class just copy the obj_id.
Exports include a validation step using ilivalidator, which will inform you whether the export contains INTERLIS validation error.
4.3.3.3. Import
To import xtf`files, click on the `import button and navigate to the .xtf file.
Note
Note that windows file pathes with empty strings in the directory path or filename are not supported at the moment.
Click on open to select the import file.
The file will then be checked whether it contains data in one of the supported models. Then a validation check with ilivalidator will take place in the background.
If the file is valid, then the import process will continue and the following dialog will appear.
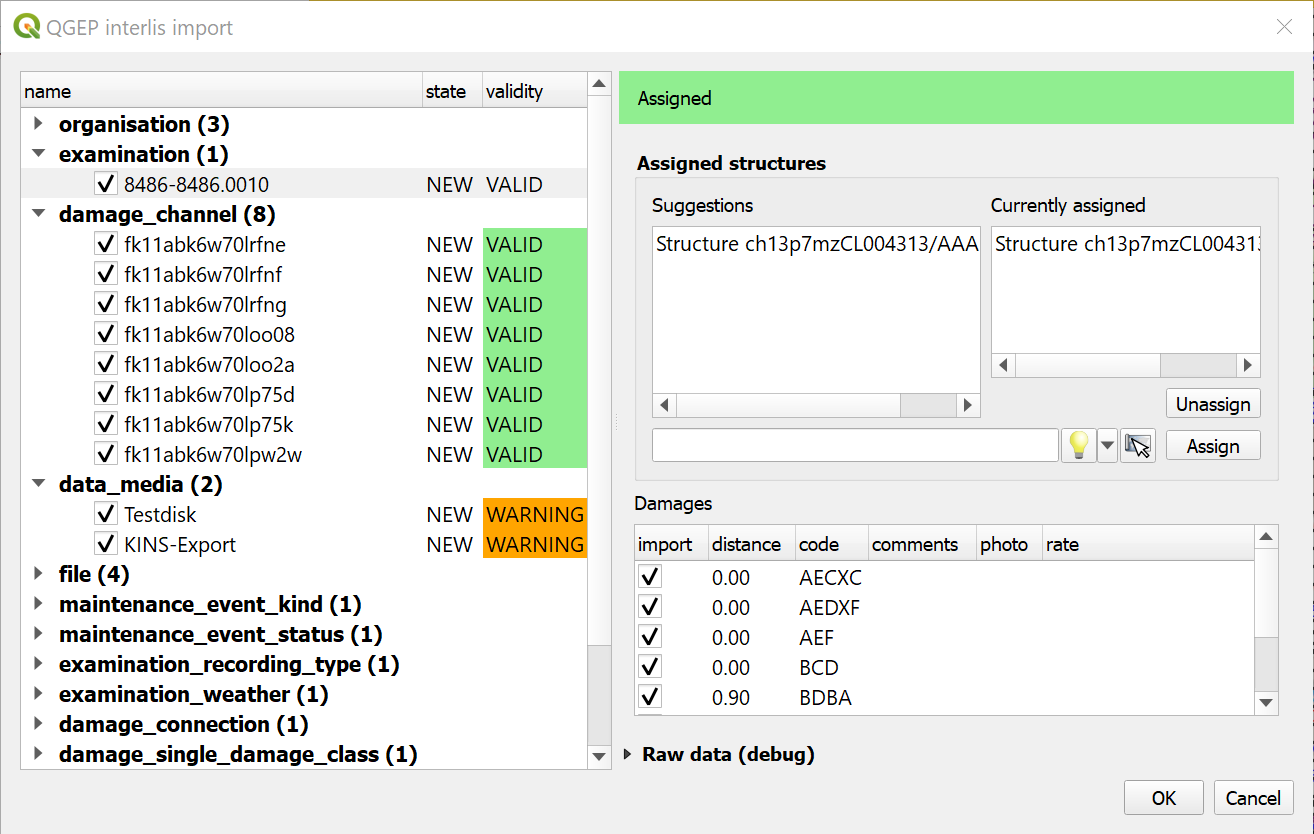
La partie gauche de ce dialogue liste tous les éléments qui vont être importés du fichier .xtf, permettant de revoir ce qui va être importé et de désélectionner les éléments que vous souhaitez ignorer. Elle montre également le statut de validation de chaque objet, indiquant si une action supplémentaire est nécessaire (INVALID) ou recommandée (WARNING) avant l’importation.
La partie droite de ce dialogue présente un formulaire spécifique au type d’élément sélectionné dans la liste, permettant d’adapter l’importation. Par exemple, il permet d’attacher des « examens » à leurs canalisations.
Une fois que vous êtes satisfait des options d’importation, confirmez la boîte de dialogue afin de conserver les changements dans votre base de données.
Wait until you see the confirmation for a valid import.
4.3.4. Utilisation (ligne de commande)
Pour une utilisation avancée, l’outil d’importation/exportation peut également être utilisé comme un outil de ligne de commande. Veuillez consulter le site https://github.com/QGEP/qgepqwat2ili/ pour obtenir de la documentation à ce sujet.
4.3.5. Further Quality Control
4.3.5.1. Quality control of an export file with VSA online checker (Fachprüfung mit VSA Checker (online))
